Now that the
Saxon's are complete, I felt the urge to give them some time on the table. I wanted to try out the
Battle of Raszyn scenario from Peter's
Blunders on the Danube for some time now. It seems ideal for a solo game as it maintains a relatively static defense, with a fairly tough defensive position in the center. I also referenced some other sources that provided a
detailed analysis of the battle as well as the
battlefield itself. Overall, there seems to be quite a bit of disagreement over the actual strength and distribution of forces on both sides. Peter's map similarly abstracts the overall battlefield to provide the right feel without necessarily being an accurate depiction of the terrain.
(At this point, if you just want to see the battle itself skip down to the next set of images...)
The biggest challenge to me with this scenario stems from the basic problem with all tabletop wargames: I know too much. One of the recurring themes in my reading was the effect of the terrain and disposition on the belligerent's understanding of the battle. Consider the following:
"Surprised at finding the entire army before him, he (the Austrian commander) decided to attack immediately with his main effort at Jaworow on the shortest route to Warsaw. Confounded by difficult terrain and Polish bullets, however, the main attack soon dissolved into a time-consuming search for bridging materials and the battle came to focus on the action in the centre." (Gill - "With Eagles to Glory" p 282)
Knowing the scenario (and the historical outcome) as well as having an overhead view of the battlefield leads to distinctly a-historical methods of play. In this battle, it would be easy to mass all of the Austrian forces against the weak Polish 2nd Brigade on the Austrian left. I can see their deployment and relative isolation. I also know that they have the weakest leader and generally lowest quality troops. Historically, the initial thrust was at Jaworow on the Austrian Right, but they discovered too late that the Poles had pulled up all of the planks on the bridge. Some Austrian troops were able to cross on a foot bridge further East, but the Austrians were never able to cross in force. The result was that the focus of the battle became the Austrian assault against the Polish Strong point in the center. This was arguably the worst possible location to attack based on the Polish disposition, but it was forced based on the Austrians limited understanding of the battlefield.
I will save further commentary for a later update, as it is a fundamental issue that impacts every attempt at replicating a historical battle in miniature.
For this battle, I opted to "Guide" the plan in the historical direction by using Peter's suggested initial array of forces:
I decided to use
Honours of War for this scenario, even though it is meant for the Seven Years War. I think the basic mechanics work fine for the later period, and I quite like the activation mechanic as well as the combat resolution model. There is also a
6mm play sheet readily available which gave me the ranges I wanted for a battle at this scale. (Musket's max range is 6cm, and movement ranges from 6-10cm for most elements) Taking
Peter's OOB, I translated it into Honours of War terms and came up with the following.
I considered folding Oberst Von Braun's two 12# batteries into Mohr's command, but decided that his
dithering rating would favor the historical outcome where they played little part in the battle. (I would not be disappointed.) I also opted for some additional rules to help reflect the historical scenario
- The Polish Advance Guard would count as receiving light cover to reflect the defensive works they were able to establish in Falentz.
- No unit could move within 6cm of the West side of the causeway to reflect the marshy terrain.
- The river is impassable except at the three defensive positions (the river was in flood)
- The Austrian divisions had to maintain their initial command arrows until a unit came within 10cm of a Polish Infantry Unit.
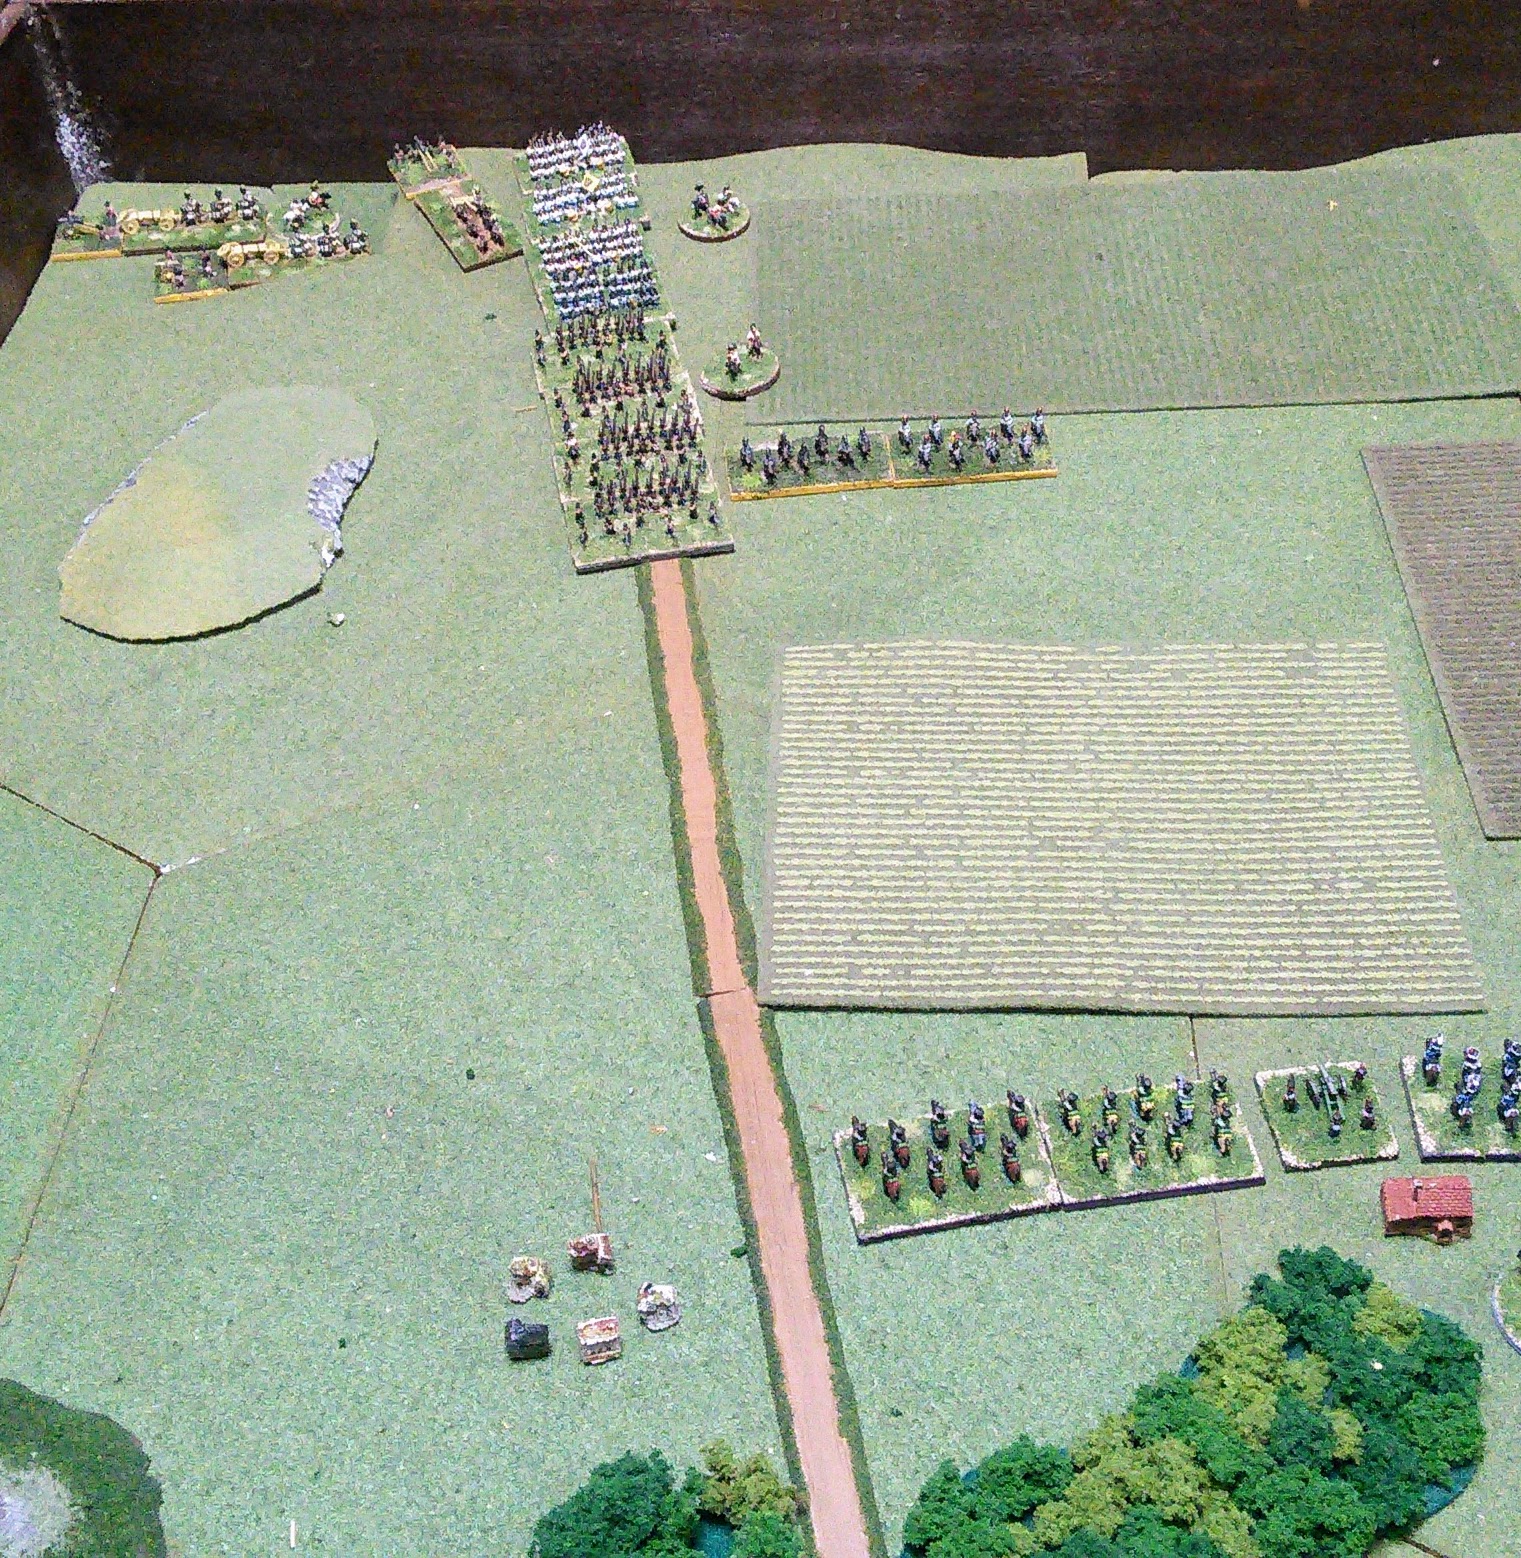
With that, I set up the board using my newly acquired Wizard Kraft rivers and roads, and commenced to breaking out my long neglected 6mm Austrians and Poles. Peter's map is for a 12'x6' board with 28mm figures, so I scaled it down to a roughly 144cm x 72cm game area.
Here is a quick summary of the battle
 |
| Initial Polish Deployments |
 |
| Austrian Advance Guard Enters the battle. The Corps Artillery is on the road behind them. |
 |
| The Advance Guard deploys and comes under fire from the Polish Horse Artillery |
 |
| The initial Cavalry skirmish goes to the Poles. |
 |
| The Polish Cavalry prepares to hand the battle off to the 1st Brigade |
 |
| Two turns of spirited advance bring Austrians into striking distance of Falenty |
 |
| The Corps heavy artillery continues to plod along, the Polish Cavalry disengages and withdraws to form a reserve. |
 |
| The Austrian 2nd Division has a much more plodding approach. |
 |
| The Advance Guard in Falenty Begins dishing out serious punishment. Prince Poniatowski rides out to bolster his defenders |
 |
| The engagement in the center rages in earnest |
 |
| The advance guard nears the culminating point. The cavalry division tries to escape across the causeway before Falenty can be carried. |
 |
| The Advance Guard finds itself fighting a delaying action for the artillery to escape along the causeway, mirroring the historical battle. |
 |
| The Advance guard is forced out of Falenty at heavy cost. The Polish center becomes a confused mass of units. |
 |
| The Austrian 2nd Division begins its bombardment of the Polish 2nd Brigade |
 |
| The Austrian Cavalry falters at the critical moment. The Poles will now be able to withdraw the last of their forces North of the river. |
 |
| The mass of fires begins to tell on the 2nd Polish Brigade. The battalions are driven back faster than fresh units can be rotated in. |
 |
| The last Polish Units make good their escape along the cause way. Prince Poniatowski begins positioning his counterattack. |
 |
| The badly blooded Austrians finally get to grips all along the line. The Poles are starting to break. |
 |
| The Polish 2nd Brigade is finally forced out of their positions. Can the Austrians force a crossing before the Polish Cavalry arrives? |
 |
| The Polish 1st Division is facing a similar problem. |
 |
| The Austrians secure Falenty. The Saxon batteries attempt to break up any massing of troops on the causeway. |
 |
| The Polish 2nd Brigade is effectively driven off from Michalowice |
At this point I decided to take a break. Things have definitely become confused and both sides are wavering. The Austrians managed to carry Falenty, and push the Poles back from the flank positions but at the overall cost of 10 infantry battalions and two cavalry regiments to the Polish loss of 3 and 1 respectively. The Austrian superiority in Artillery is becoming quite telling, but I am not sure if they should have the ability to range as far as they are shooting. Pictures and accounts of the battle seem to indicate that there was a lot of brush and vegetation to either side of the river that would have made accurate targeting difficult. I have found a few areas where I mirrored the actual battle
- Recalling the Polish cavalry to Raszyn (it is the closest viable crossing, and the Austrian assault on Falenty threatens to cut them off on the wrong side of the river.)
- Fighting a delaying action to buy time for the advance guard's guns to withdraw. (It cost one of the infantry battalions, but was necessary)
- The cavalry skirmish kept Mohr blind to state of the crossing at Joworow, so they ended up committing the entire Advance Guard to the attack there, with no way of crossing Cavalry or Artillery.
While I had hoped to have Prince Poniatowski lead his famous counter-attack at the causeway, the snarl of units transiting the crossing made any attempt at organizing a counterattack unlikely to succeed. Once it was straightened out, the Austrians managed to establish their batteries to make an attempt more expensive then advisable.
I plan to finish the last few rounds of this game, however I believe that a Soviet Assault Crossing to dislodge a US mechanized Infantry battalion may also be in order.....


Jake, your game table and 6mm troop deployments look fantastic!
ReplyDeleteUsing HoW, did you find anything inherent in its SYW focus that was difficult to port over to Napoleonics? At this scale and with each BMU representing a battalion, how did you account for square or skirmishers? Are those implicit in the game and below the level of detail that command to which command would be concerned?
HoW game engine seems solid to me too and I see no reason why it could not be brought forward into Napoleonics.
As for your Helicopter View brought about from the nature of wargaming's all-seeing/all-doing actions, these can be mitigated through proper scenario design or using rules that curtail these quick and perfect responses. Your formation directives look to be a good compromise.
Razyn is a scenario I have not played but would enjoy doing so.
Good stuff!
I think it ported over quite well. As for square I just modified the reaction roll for charges. I had the infantry react on a 3+ when charged by cavalry rather than a 4+. If successful they formed square. Cavalry can abort charge. In melee Infantry in Square get +2 vs Cavalry, Cavalry get -2.
DeleteYour 6mm troops and the new roads look great. I see you found a use for the Swamp as well! This has been a close fought scenario each time we played it. The Polish advance troops at first seem perhaps ill placed, but they are needed to keep the Austrians from advancing unmolested and deploying their artillery to blast their way across the river too early on. IIRC, the Austrians usually prevail, but at heavy cost. In the big picture, that outcome is a win for Poniatowski and the Poles. They put up a very creditable fight, and the army and its leaders get very valuable battlefield experience. For a slightly different take on the Battle, see that of my freind Michael (aka Wargamer Rabbit):
ReplyDeletehttps://wargamerabbit.wordpress.com/2016/09/20/battle-of-raszyn-1809/
and
https://wargamerabbit.wordpress.com/2016/08/15/battle-of-raszyn-1809-aar/
Anyway, it's a battle I'd happily play again, and a bit unusual in that no French are involved!
It is definitely a tough game for the Austrians to crack open. I think the Polish advance is exceptionally well placed to form a bastion and force the Austrians to deploy early. Your OOB ensures that the Austrians are not going to roll over it. I read Michael's write-up as part of my precursor to trying out the scenario. I found his map set-up slightly more restrictive than I wanted to try. Outstanding resource though. It was quite an entertaining scenario, thanks for writing it Peter!
DeleteGlad you're enjoying it. It was really the formative action for the fledgling army of the Grand Duchy of Warsaw; their performance kept getting better from here on!
DeleteThe Poles have always held a certain fascination for me in history. The PL Commonwealth was basically sundered by its neighbors and they have been struggling to re-assert their sovereignty ever since.
DeleteThe 6mm visual and the account came together very nicely - thanks, enjoyed.
ReplyDeleteThank you. Check out Peter's page if you want to see these scenarios done on a much more in depth level.
Delete